


Dividing perennials is the easiest way to get free plants for your garden. When a perennial clump gets too large, you can dig it up, split it into smaller sections, and replant each one as its own plant. Every division has its own roots and shoots, so it grows independently. Spring is the best time to divide most perennials because the plants are full of stored energy and ready to establish quickly. Here’s how to do it.

Dividing Keeps Your Perennials Healthy and Productive
Perennials don’t stay the same size forever. Over time, clumps grow outward and the center of the plant becomes crowded, woody, or dead. When this happens, you’ll notice fewer blooms, weaker stems, and an overall decline in the plant’s appearance. Dividing solves this problem.
- Overcrowded perennials produce fewer and smaller flowers over time.
- The center of an old clump often dies out, leaving a ring of growth around a bare middle.
- Dividing removes the dead center and gives each section room to grow.
- The parent plant benefits just as much as the new divisions.
Think of dividing as a reset. You’re not hurting the plant—you’re giving it a fresh start. The divisions you replant elsewhere are a bonus.
Spring Is the Best Time to Divide Most Perennials

Early spring is the ideal window for dividing perennials. You want to catch the plant when new shoots are just starting to emerge from the soil but before there’s significant leaf or stem growth above ground. At this stage, the plant has a full reserve of energy stored in its roots but hasn’t spent any of it on top growth yet.
- Divide in early spring when new shoots are 1–3 inches tall.
- The plant’s energy is concentrated in the root system at this stage.
- Cool, moist spring weather helps divisions recover quickly.
- Dividing before hot weather arrives gives roots time to establish.
There is one exception. Perennials that bloom in early spring—like bleeding heart and candytuft—are better divided in the fall after they’ve finished flowering. If you divide a spring bloomer right before it flowers, you’ll likely lose that season’s blooms.
These Perennials Are Best Divided in Spring
Summer and fall blooming perennials are the best candidates for spring division. These plants aren’t anywhere near flowering when you divide them in spring, so they have plenty of time to recover and bloom on schedule.
- Hostas: One of the easiest perennials to divide. Dig and split when the “eyes” are just poking through the soil.
- Daylilies: Tough and forgiving. You can split daylily clumps with a shovel and they’ll bounce right back.
- Coneflowers: Divide in early spring when new basal growth appears.
- Bee Balm: Spreads aggressively and benefits from division every 2–3 years.
- Sedum: Easy to divide. Even small pieces with roots attached will grow.
- Ornamental Grasses: Divide in spring just as new green growth appears at the base.
- Black-Eyed Susan: Clumps thicken quickly and divide easily.
Avoid dividing spring-blooming perennials like bleeding heart, creeping phlox, and irises in the spring. Wait until late summer or fall for those.
How to Divide Perennials [Step-by-Step]
Dividing a perennial is straightforward. You don’t need much—just a sturdy digging shovel, like this one, a knife, and about 10 minutes per plant. Here’s the process:
- Water the plant thoroughly the day before you plan to divide it. Moist soil makes digging easier and reduces stress on the roots.
- Cut back any remaining dead foliage from last season so you can see the new growth clearly.
- Dig around the entire clump, staying about 4–6 inches away from the outer edge of the plant. Go deep enough to get under the root ball.
- Lift the entire clump out of the ground and set it on the soil surface, or on a soil mat.
- Use your you knife to cut the clump into sections. Each section needs at least a few healthy shoots and a solid mass of roots.
- Discard any dead, woody, or hollow sections from the center of the clump.
- Replant your divisions immediately. Don’t let the roots dry out.


Some perennials pull apart easily by hand. Hostas and daylilies often separate into natural divisions with a little pressure. Others, like ornamental grasses and coneflowers, may need a sharp spade or even a serrated knife to cut through the root mass.

Replant Divisions at the Same Depth as the Original
How you replant your divisions matters. Planting too deep is one of the most common mistakes and can smother the crown of the plant. Planting too shallow exposes roots to air and sun. Match the original depth and you’ll be fine.
- Dig a hole slightly wider than the root mass of your division.
- Add a handful of compost to the bottom of the hole and mix it into the soil.
- Set the division in the hole at the same depth it was growing before.
- Backfill with soil, press firmly around the base, and water deeply.
- Apply a thin layer of mulch around the plant, keeping it away from the crown.
Water your new divisions regularly for the first few weeks. They don’t have a fully established root system yet, so they’ll dry out faster than your existing plants. Once you see strong new growth, you can back off to your normal watering schedule.
A Single Plant Can Give You Several Free Divisions

How many divisions you get depends on the size and age of the plant. Older, larger clumps produce more divisions. Younger plants may only split into two or three pieces.
- A mature hosta clump (4+ years old) can yield 4–8 divisions.
- A well-established daylily can give you 3–6 divisions.
- Bee balm and black-eyed susan spread quickly and can produce 4–8 divisions from a single clump.
- Smaller or younger plants may only give you 2–3 divisions.
Don’t try to squeeze out as many divisions as possible. Each piece needs enough roots and shoots to survive on its own. A few strong divisions will outperform a handful of weak ones every time. As divisions grow into larger plants, you can keep dividing them into more and more plants.
Pot Up Weak Divisions Instead of Planting Them Directly
Sometimes a division comes out looking rough. Maybe it has fewer roots than you’d like, or only one or two small shoots. These divisions can still survive, but they’ll do better in a pot than in the ground.
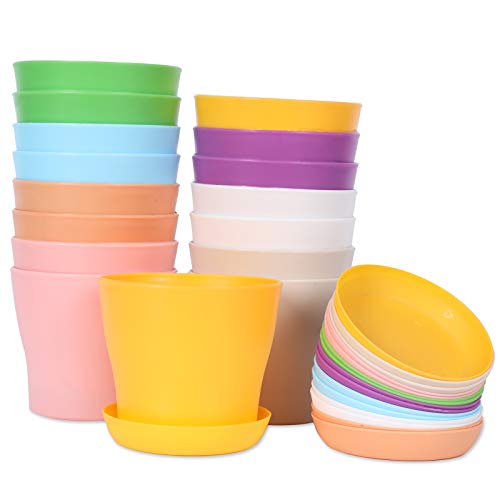
- Place weak divisions in these nursery pots with quality potting mix.
- Keep them in a shaded area and water consistently.
- Once you see strong new growth and roots filling the pot, transplant into the garden.
- This recovery period usually takes 3–6 weeks.
Potting up weak divisions gives them a controlled environment to recover in. They don’t have to compete with established plants for water and nutrients while they’re trying to get their roots going.
Mistakes to Avoid When Dividing Perennials
Dividing perennials is simple, but a few common mistakes can reduce your success rate. Here’s what to watch out for.
- Dividing too late in the season: If the plant already has full foliage and flower buds, you’ve missed the window. The plant will struggle to recover in the heat of summer.
- Making divisions too small: Each division needs a healthy clump of roots and at least 3–5 shoots. Tiny pieces with one shoot and barely any roots rarely survive.
- Letting roots dry out: Once you lift a clump out of the ground, work quickly. Exposed roots dry out fast in sun and wind. Replant or pot up divisions within an hour.
- Planting too deep: Match the original planting depth. Burying the crown under extra soil can cause rot.
- Skipping water after replanting: Divisions need consistent moisture for the first few weeks. Don’t plant them and walk away.
If you avoid these mistakes, the vast majority of your divisions will survive and thrive.
How Do You Divide Perennials in Spring?
To divide perennials in spring for free plants, follow these guidelines:
- Divide in early spring when new shoots are just emerging from the soil.
- Focus on summer and fall blooming perennials. Save spring bloomers for fall division.
- Dig up the entire clump and split it into sections, each with healthy roots and shoots.
- Discard any dead or woody material from the center of the clump.
- Replant each division at the same depth as the original plant.
- Water deeply after planting and keep the soil consistently moist for the first few weeks.
- Pot up any weak divisions and let them recover before transplanting to the garden.
- A single mature perennial can yield anywhere from 2–10 free plants depending on the species and age.
Dividing perennials costs nothing and takes minutes. It keeps your existing plants healthy while giving you free plants to fill gaps in your garden, start new beds, or share with neighbors. If you’ve never done it, spring is the time to start.


