


Planting annuals is one of my favorite parts of the growing season. I love walking through the nursery, seeing all the flower varieties and color combinations just waiting to be brought home. It never gets old.
But as fun as it is to plant annuals, getting them to bloom like crazy all summer long takes a little know-how.
If you’ve ever planted flowers that looked amazing for a few weeks and then just fizzled out, you’re not alone. The good news is that with the right care, your annuals can stay full of life and color from the moment you plant them until the first frost.
Here are my go-to tips for getting more blooms out of your annuals this season.

Plant Your Annuals in a Good Spot
The first step to more blooms from your annuals is making sure you plant them in the right location.
Most annuals need 6-8 hours of sunlight every day, so planting them in an area without enough sun is going to result in leggy growth without any beautiful flowers. Petunias are notorious for having this problem.
Annuals also need the right soil conditions, rich in organic matter, to thrive.
For example, my garden’s soil is heavier clay, so amending my soil with organic-rich compost allows water to drain better.
Better drainage prevents soggy roots which can be detrimental to annual flowers.
Use these quick steps to see how well your soil is currently draining.
Annuals Need Room to Grow
I still remember the first time I planted petunias in my garden.
I bought a small 6-pack at my local nursery, brought them home, and was immediately confused about how far to space them.
Because I was still so new to gardening at the time, it didn’t occur to me that these plants were going to get bigger.
Much bigger.
Luckily, I paid attention to the spacing recommendations on the plant tag, so I still ended up with beautiful flowers. But it could have been disastrous.
Always pay attention to (and follow) the spacing recommendations for the specific flower you’re planting.
It might look a little off at first when the plants are small, but they’ll quickly fill in the space as they grow, especially if you follow the next tip.
Fertilize Your Annuals to Thrive
Because annuals want to show off their beautiful flowers, they need more nutrients, especially if you’re growing them in containers.
I like to use this blossom-booster fertilizer on all my annuals every 14 days. It gives them the major nutrients they need for bigger and better blooms, plus a bunch of helpful micronutrients to keep the plants healthy.
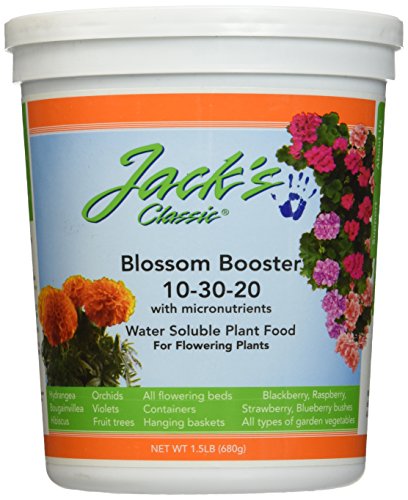
It’s important to follow the measurement instructions when applying fertilizer. You want to avoid using too much at once or applying it too often.
If your annuals stop blooming and start producing a lot of green leaves, that’s a clear sign they’re getting too much fertilizer.
Deadheading Will Bring More Blooms
Deadheading is one of those tasks that can turn people off from growing annuals because it takes time.
But if you want bigger, longer-lasting blooms, it’s worth doing.

Once flowers finish blooming, the plant shifts its energy into producing seeds. That process takes a lot out of the plant, which means it has less energy left to create new blooms.
This is why it’s important to deadhead your annuals before they go to seed.
By removing spent blooms, you redirect the plant’s energy into producing more flowers, and often bigger ones, throughout the growing season.
You can deadhead by simply pinching or snipping off the faded flower just above a set of leaves. I love using these microtip pruners to always get a clean cut every time.

Annuals like petunias, marigolds, zinnias, and geraniums respond especially well to regular deadheading and will reward you with non-stop color.
Annuals Need the Right Amount of Water
It’s always better to water your annuals deeply and less often, rather than giving them a light sprinkle every day. Deep watering encourages roots to grow down into the soil, where they can access moisture and nutrients that shallow roots can’t reach.
There’s no one-size-fits-all schedule for watering because your climate, soil type, and recent weather all play a role. Long droughts will require more frequent watering, while rainy periods will require less.
Most annuals prefer consistently moist, but not soggy, soil. To check your soil’s moisture level, try the pencil test. Stick a clean pencil into the soil a few inches deep. If it comes out with damp soil clinging to it, your plants are good to go. If it comes out clean, it’s time to water.
Mulch Helps Annuals During the Heat of the Summer
Speaking of water, one of the best ways to help your annuals hold onto moisture during hot weather is by using mulch.
A 2 to 3 inch layer of mulch helps trap water in the soil, giving your annuals access to it when conditions are dry. It also cuts down on weeds without needing any herbicides.
Weeds compete with annuals for nutrients, so the fewer there are, the better your flowers will grow and bloom.
Mulch also helps regulate soil temperature during the hottest part of the summer and, if you’re using organic mulch, it can slowly improve your soil as it breaks down over time.
Just make sure to keep mulch a couple inches away from the base of your plants to avoid rot.
Shredded bark, straw, or even composted leaves all make great mulch options for annual beds.
Keep Pests Away
You shouldn’t have much trouble with pests if you’ve been following the tips above. Most pests are drawn to stressed-out plants that aren’t getting what they need.
By giving your annuals the right amount of water, proper nutrients, good air circulation, and a healthy growing environment, you’ll drastically reduce the chances of aphids, spider mites, or other pests moving in and stopping your blooms.
Pests like to feed on new growth and flower buds, which can prevent your plants from producing more blooms.
That said, even the healthiest garden can run into trouble. I once had a nasty outbreak of thrips on some of my annuals. I sprayed them with this neem oil and cut the plants all the way back. Within a few weeks, they bounced back and looked great.

If pests or disease have completely taken over a plant, it’s usually best to remove it entirely so the problem doesn’t spread to the rest of your garden.

By following these simple steps, your annuals should provide stunning color all summer long.


